You can absolutely get café-style freshness at home—without turning your counter into a science lab. The catch: “coffee maker with grinder” can mean wildly different machines, from simple grind-and-brew drip brewers to full automatic bean-to-cup espresso systems.
What if the “best coffee maker with grinder” isn’t the fanciest all-in-one at all—because the grinder is the weak link? Some integrated machines have one grind setting, which means you can’t really tune taste. I’ll show you when an all-in-one is a smart simplification, and when a separate grinder plus a better brewer makes noticeably better coffee for the same money.
TL;DR: If you want the easiest “fresh grind → brew now” routine, buy a coffee maker with burr grinder + adjustable grind that’s easy to clean. If you mostly drink lattes, skip drip grind-and-brew and shop automatic espresso. If you care most about taste per dollar, a dedicated coffee grinder plus a better brewer often wins.
Quick picks: best coffee makers with grinders
The “best” choice is the one that fits your drink style and your cleaning tolerance. Review roundups tend to converge on a few themes—adjustable burr grinding, consistent brewing, and workable maintenance—especially in lists like tested 20+ grinder brewers.
Three quick picks (choose your lane): If you drink mostly mugs, prioritize a grind and brew coffee maker that’s adjustable and easy to clean. If you drink lattes and cappuccinos, prioritize an espresso machine with grinder that matches how you want milk handled. If you want the best taste-per-dollar and don’t mind two devices, prioritize a burr coffee grinder plus a great brewer.
Materials and “nice to have” features: If you’re shopping high end coffee maker with grinder options, prioritize serviceability and cleaning access over extra screens. A stainless steel coffee maker with grinder can feel sturdier, but the parts that matter most are the grinder path, basket, and seals—those are what decide long-term flavor.
Reviews, without the rabbit hole: For quick confidence, skim a couple of coffee maker with grinder reviews for your exact model and look for repeated themes (grinder clogging, noise, messy chutes). If you like ratings-driven sources, compare what shows up in Consumer Reports best coffee maker / best single serve coffee maker lists, Wirecutter recommendations, and a few “best coffee maker Reddit” threads—then use the same criteria across all of them.
Top picks at a glance (use-cases, not hype):
| Best for… | What to look for | Example types/models | Why it wins |
|---|---|---|---|
| Everyday drip, best flavor control | Adjustable burr, thermal option, strong water distribution | Breville Grind Control–style grind-and-brew | More dial-in room when beans change |
| Budget-friendly grind-and-brew | Simple controls, removable parts, “good enough” burr or improved blade design | Cuisinart / Black+Decker grind-and-brew–style machines | Freshness boost without premium pricing |
| Single cup, flexible mornings | True single-serve mode, easy grounds cleanout, podless option | Single-serve grinder brewers; some K-Cup hybrids | Convenience without committing to pods |
| Latte/cappuccino drinks | Bean-to-cup espresso, steam wand or auto-milk | Philips / De’Longhi bean-to-cup–style espresso machines | One-button drinks beat drip every time |
Tip: treat “example models” as a starting point. The real win is matching machine category + grinder quality + maintenance access to your routine.
Who this is for
- Freshness-first drinkers who want beans ground right before brewing.
- Busy mornings where convenience matters more than perfect dial-in.
- Households that want one device to reduce counter clutter.
Who should skip
- Ultra-picky light-roast fans (separate grinder usually tastes better).
- Low-maintenance households that won’t clean the grinder weekly.
- Milk-drink heavy homes (bean-to-cup espresso fits better).
Two quick edge cases: if you mostly use pre-ground, you may be happier with the best coffee maker for ground coffee rather than paying for a grinder you won’t use. And if you’re shopping “best multifunction coffee maker” claims (even a “best 4 in 1 coffee maker” or a coffee maker with blender), treat those as separate categories—grinder quality and cleaning access are often the first compromises.
Category fit: grind-and-brew vs bean-to-cup
Pick the machine category first—then argue about features. Many “best of” lists split winners by use-case (drip vs espresso vs convenience), which is why you’ll see category-based roundups like lab-tested grinder picks rather than a single universal champion.
After that first link, you can treat the guidance like a map: The Spruce Eats’ hands-on testing tends to favor machines with better grinding and fewer daily annoyances, while Good Housekeeping’s lab approach often highlights category winners and practical usability. Different angles—same core question: will this fit your life?
Grind-and-brew drip machines
Best if your “default drink” is a mug of drip coffee and you want the workflow to feel like: fill hopper → fill water → hit brew. The best versions nail three basics: consistent grind, even saturation, and easy cleanup. Their limitation is range—drip machines don’t make real espresso, and grind settings may be coarse overall.
If you’re searching for the best grind and brew coffee maker, what you really want is a drip coffee maker with grinder that’s adjustable and simple to maintain—because that’s what separates the best drip coffee maker with grinder from the frustrating ones.
Bean-to-cup espresso machines
Best if you want milk drinks or “coffee shop menu” convenience. These grind, dose, and brew espresso-style coffee with a built-in grinder, and many offer one-touch beverages. The tradeoff: they’re more complex, need more cleaning steps, and their grinder may be optimized for espresso ranges rather than versatile drip brewing.
If you’re shopping the best home espresso machine with grinder, decide how you want milk handled: steam wand, auto-frother, or a cappuccino system. That’s the practical difference between “I’ll use this daily” and “this becomes weekend-only.”
Want both styles in one unit? That’s the “combo” category: a coffee and espresso maker with grinder (sometimes described as an espresso and drip coffee maker with grinder). The best combo coffee maker is usually the one that does your non-negotiable drink really well and the other drink acceptably—so decide which cup you’d miss most.
Grinder basics: burr vs blade (and why adjustment matters)
A great brewer can’t fix uneven grind—because extraction starts at the particle level. When grounds are a mix of boulders and dust, you get the worst combo: weak, sour notes from under-extracted chunks and bitter, harsh notes from over-extracted fines.
Think of grind like slicing bread. Even slices toast evenly. A mix of crumbs and thick chunks burns and stays raw at the same time. Coffee behaves the same way—just faster, and with more ways to taste the difference.
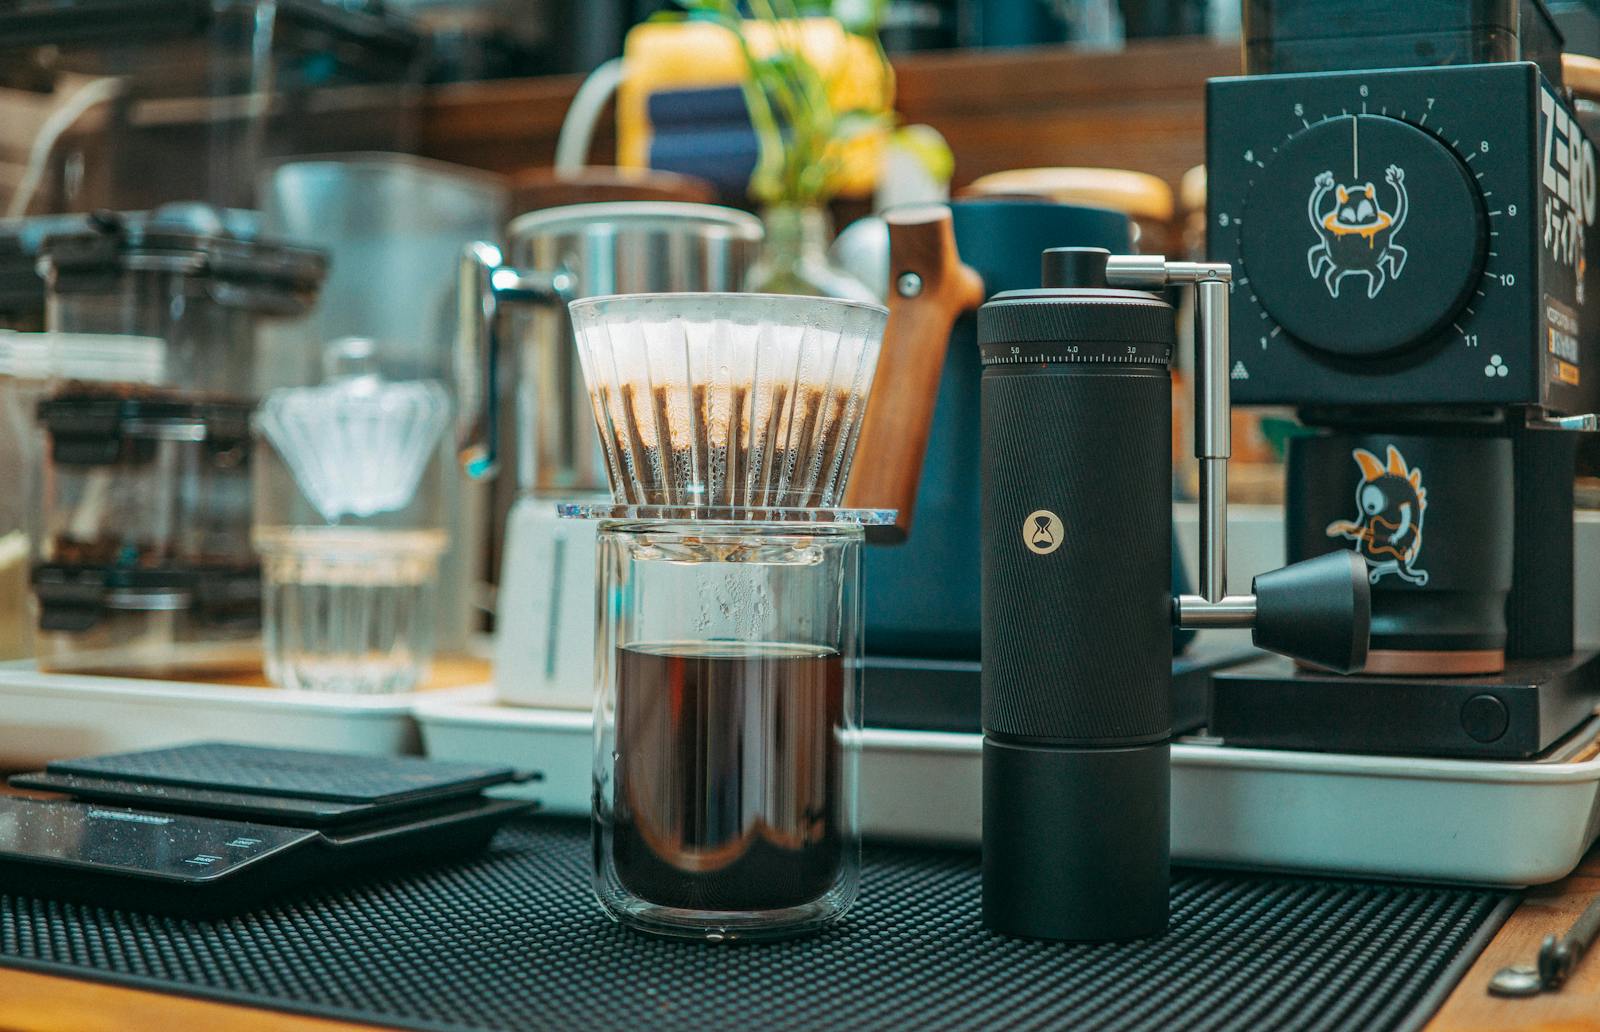
Conical burr grinders in plain English
A burr grinder “shears” beans between two cutting surfaces, producing a more consistent particle spread. That consistency is what makes your coffee taste more repeatable from day to day. Even better: adjustability. Being able to go a notch finer (more strength) or coarser (less bitterness) is the difference between “this machine is okay” and “this machine stays good when you change beans.”
How to use adjustment without spiraling: change only one click at a time, brew twice, and take notes. If you adjust grind and dose together, you won’t know which change helped.

What to notice: the cutting teeth and the narrow pathway where particles pass through. The more predictable that pathway is, the easier it is to brew coffee that tastes the way you expect.
Real-life tip: if your machine has only one “grind” setting, treat it like a convenience tool. If it has multiple steps (or micro-steps), you can actually tune taste.
Blade grinder red flags
Blade grinders chop beans like a tiny propeller. They’re fast and cheap, but they tend to create more fines and more variability. If you’re reading specs, watch for telltales: no grind adjustment, vague language like “integrated grinding,” and reviews that mention “muddy” taste or “bitter then weak” cups. Blade-style systems can still be enjoyable for medium-dark roasts—just don’t expect precision.
Shortcut for shopping grinders: if your goal is “best coffee grinder” consistency, a standalone automatic coffee grinder (especially burr) is often the easiest upgrade. For drip, the best coffee grinder for drip coffee is one that can repeat a medium-coarse grind; for percolators, a coffee grinder for percolator use should go coarser to avoid harshness. When you compare coffee grinder reviews, look for consistency, retention (leftover grounds), and ease of cleaning—not just how fast it grinds.
If you can change beans but can’t change grind, you’re stuck chasing taste with guesswork.
Workflow fit: capacity, speed, and daily routine
The right machine feels “obvious” at 7 a.m.—the wrong one feels like chores. Before you fall for features, picture your real morning: who’s brewing, how many cups, how much time, and whether anyone is willing to do a quick clean. Grinder-brewers reward consistency, but they also punish neglect (oily beans + grinder parts = funk).
Micro-case: If you’re a solo drinker who leaves the house fast, a small-batch option or single-serve mode matters more than a giant hopper. If you’re brewing for two or more people, a carafe that pours cleanly and keeps coffee stable for 30–60 minutes matters more than extra drink presets.
Single-serve vs carafe
Single-serve is great for solo drinkers and shifting schedules—but it can be less flexible on strength and may cost more per cup if it relies on proprietary pods. Carafe machines are better for families and hosting, and they make “brew once, pour twice” easy.
If you want a single serve coffee maker with grinder, decide whether you’re okay with pods. A single serve coffee maker no pods with grinder usually uses a reusable filter basket and is cheaper per cup. A k-cup coffee maker with grinder can be convenient for guests, but the best setups let you brew podless, too. If you’re chasing the best single serve coffee maker with grinder, prioritize brew temperature consistency and easy grounds cleanout over extra drink buttons.
Thermal carafe vs hot plate
A thermal carafe keeps coffee stable longer with less “cooked” flavor, especially if you sip over an hour. A hot plate can be convenient and cheaper, but coffee flavor tends to flatten as it sits. If you regularly brew and forget it for 30–60 minutes, thermal is usually worth the upgrade—even if the carafe takes slightly more effort to clean.
And yes—if you love scheduling your mornings, choose a programmable coffee maker with grinder (a true coffee maker with grinder and timer) so you can standardize weekday routines without redoing settings daily.
Fast workflow wins
- Front-fill water (no cabinet gymnastics).
- Removable hopper or easy access for wiping oils.
- Clear programming for timer-based brewing.
Slow workflow pain
- Hidden chutes where grounds cake up.
- Hard-to-remove brew baskets and burr parts.
- Overly loud grind cycles when others are asleep.
Office and big-batch note: For an office coffee maker with grinder or a coffee maker for large groups, reliability and capacity beat fancy features. Favor thermal holding, simple buttons, and easy-to-clean parts. For true commercial coffee machine and grinder setups, separate equipment and serviceability matter even more.
Brew quality checkpoints that actually change taste
Brew quality is mostly “hot water + even saturation + enough contact time.” You don’t need to memorize standards—you just want a machine that reliably brews in a good temperature range and doesn’t channel water through one spot. Many serious testing-minded guides emphasize the classic 195–205°F brew range as a practical benchmark for extraction consistency.
Easy starting ratio: for drip, aim for about 1 part coffee to 16 parts water by weight (for example, 30 grams coffee to about 480 grams water). From there, tune using grind first, then dose. This keeps your tweaks consistent when you change beans.
Temperature and contact time signals
If your coffee tastes sour and thin even with good beans, the machine may be brewing too cool or too fast. If it tastes harsh and bitter, it may be too hot, too slow, or grinding too fine. The goal is repeatability: when you change one variable (like a new bag of beans), you can adjust grind or dose and get back to “your” cup without starting from scratch.
Taste troubleshooting (quick checklist):
- Sour or watery: grind slightly finer, or increase coffee a little, then brew again before making any other changes.
- Bitter or ashy: grind slightly coarser, or reduce coffee a little, and make sure coffee isn’t sitting on a hot plate too long.
- “Hollow” flavor: check freshness of beans, then confirm your basket is level so water saturates evenly.
- Inconsistent cups: stop changing multiple settings at once; track one adjustment per two brews.
Showerhead coverage and bloom
Even water distribution matters more than it sounds. A wider showerhead (or multiple outlets) helps soak the bed evenly, reducing dry pockets that under-extract. Some machines add a short pre-wet or bloom step; that can help with freshness and evenness, especially with lighter roasts. If your machine doesn’t bloom, you can still improve results by using a slightly coarser grind and making sure the filter basket is level before brewing.
Specs that matter (and the “why”):
| What to check | Why it matters | Quick shopping rule |
|---|---|---|
| Grind adjustment steps | Helps tune strength/bitterness per bean | More than “low/med/high” is a good sign |
| Thermal vs hot plate | Affects flavor after brewing | Thermal if you sip slowly |
| Removable burr access | Controls stale-oil buildup | Choose “easy to clean” over extra buttons |
| Water filtration option | Better taste; less scale | Nice-to-have if your water is hard |
Maintenance reality: keeping the grinder (and coffee) clean
Coffee oils go stale fast—so “clean enough” is a flavor upgrade, not just hygiene. The grinder area is the main difference between these machines and a standard drip brewer. Grounds, fines, and oils collect in chutes and around burrs. If you ignore that, you’ll notice a flat, slightly rancid background note that makes even great beans taste “meh.”
Rule of thumb: if you can smell yesterday’s coffee when you open the hopper, it’s time for a quick wipe and brush-out. That stale aroma shows up in the cup faster than most people expect.
Weekly grinder and hopper routine
Once a week (or every 10–14 brews), do a 3-minute reset: empty the hopper, brush out loose grounds, wipe the hopper with a dry microfiber cloth, and clean any removable burr parts per the manual. Avoid water near burrs unless the manufacturer explicitly allows it. If your machine has a grounds chute, check it for packed fines—those are the “hidden flavor killers.”
Self-cleaning reality: “rinse” or “self-clean” cycles can help keep the brew path fresh, but they don’t replace physical cleaning of grinder chutes. If you’re shopping the best self cleaning coffee machine, confirm what the cycle actually cleans (brew path vs grinder vs milk system).
Descaling and water basics
Scale buildup can mess with temperature and flow, which then shows up as sour or weak coffee. If your water is hard, plan to descale more often and consider a compatible water filter. If your machine has a reminder cycle, follow it; if not, a simple rule is: descale whenever you notice slower brewing, “spitty” dripping, or a sudden taste shift that doesn’t respond to grind changes.
Weekly checklist
- Hopper wipe (dry cloth; remove oily residue).
- Burr brush (loosen fines; clear exit chute).
- Basket rinse (soap is fine; rinse fully).
Monthly checklist
- Deep clean removable grinder parts (per manual).
- Descale if your water is hard or taste shifted.
- Gasket check (look for old grounds trapped in seals).
Safety note: Unplug before cleaning near grinder burrs, moving parts, or heating elements. Let the machine cool before wiping around brew heads and hot plates.
Kitchen fit: noise, footprint, and “will I hate this?” factors
Most regret isn’t about taste—it’s about noise, mess, and awkward refills. Built-in grinders can be loud, especially early mornings, and many machines need “air space” around them for lid access and steam (if espresso-based). If you’re debating all-in-one vs separate gear, it helps to read perspective on integrated grinder tradeoffs and ask: what do I want to be effortless—grinding, brewing, or cleaning?
Built-in and plumbed track: If you’re remodeling, you may be comparing a built-in coffee machine (including a built-in wall coffee machine) or even a plumbed coffee maker with grinder. These prioritize convenience and aesthetics, but installation, filtration, and service access matter more than minor feature differences. Brands people cross-shop here include Thermador built-in coffee machine options and Bosch inbuilt coffee machine models.
Noise expectations
Grinding is the loud part; brewing is comparatively quiet. If you’re trying not to wake a household, look for machines with shorter grind cycles (or ones that grind only what they need, not the whole batch). A practical compromise: grind the night before into an airtight container only if you’re okay trading a little freshness for peace. Otherwise, place the machine on a stable mat and keep loose items off the counter to reduce rattling.
Space planning (the overlooked measurements)
Measure three things: (1) total height under cabinets, (2) how far the lid must open to pour water/beans, and (3) the front clearance needed to remove the carafe and basket cleanly. For espresso-style machines, add clearance for steam wand movement and milk pitcher access. If you can’t refill comfortably, you’ll end up “topping off” and brewing inconsistent cups—an avoidable problem that looks like “my coffee tastes random.”
Five-minute choosing framework (with a printable decision tool)
Choose one non-negotiable, two strong preferences, and one dealbreaker—then shop inside that box. This keeps you from overpaying for features you’ll never touch (and from buying a gorgeous machine that turns into a cleaning project).
Separate-grinder tipping point
Go separate if any of these are true: you buy different beans often and want to dial in flavor, you drink lighter roasts that punish inconsistent grinding, or you’re annoyed by the idea of cleaning grinder chutes inside a brewer. A solid standalone burr grinder plus a strong drip brewer can out-taste many all-in-ones at the same total cost—especially over time as parts wear.
Red-flag checklist
If you spot two or more of these, keep shopping: no grind adjustment, unclear cleaning access, confusing programming, complaints about clogged chutes, and “warm plate only” when you know you sip slowly. Also beware machines that promise espresso with drip-style mechanics; you’ll get strong coffee, not true espresso.
Printable decision matrix (fill it in, then circle your winner)
Rate each option 0–2 (0 = weak, 1 = acceptable, 2 = excellent). Add a quick note so future-you remembers why you chose it. Mobile tip: tap a cell to type.
| Criteria (edit as needed) | Option A score (0–2) | Option B score (0–2) | Notes (what matters to you) |
|---|---|---|---|
| Grind adjustment range | |||
| Cleaning access (hopper + burr + chute) | |||
| Brew consistency (even saturation) | |||
| Capacity fit (solo vs household) | |||
| Noise tolerance (morning reality) | |||
| Counter fit (height + clearance) | |||
| Price comfort (today and upkeep) | |||
| Total (add your scores) |
Printing tip: In your print dialog, choose “Save as PDF” if you want to keep your notes for later.
Buying and “near me” searches: If you’re comparing “coffee maker with grinder Amazon,” “coffee maker with grinder Walmart,” “coffee maker with grinder Target,” or “best buy coffee maker with grinder,” focus on return policies and warranty support as much as price. For “coffee maker with grinder sale” seasons, verify replacement filters/parts availability. If you’re searching “coffee maker with grinder near me” or “espresso machine with grinder near me,” local appliance dealers can be a win for service—especially for higher-end machines.
Advanced notes (optional): beans, freshness, and settings
Bean storage: If your machine has a hopper, only load what you’ll use in 3–5 days to reduce stale flavor and oil buildup. Oily dark roasts can gum up grinder parts faster; if you love dark roasts, prioritize easy-access cleaning.
Easy starting point: For drip, start mid-coarse, then adjust one notch at a time. If coffee tastes hollow, go a touch finer or add a bit more coffee. If it tastes harsh, go a touch coarser or reduce coffee slightly.
Common grind-and-brew cross-shops
- Cuisinart Grind and Brew coffee maker
- Cuisinart DGB-30 grind and brew
- Breville Grind Control coffee maker
- GE Profile smart grind and brew coffee maker
- Café grind and brew coffee maker
- Ninja coffee maker with grinder
- Oxo coffee maker with grinder
- Black and Decker coffee maker with grinder
- PowerXL Grind and Go Plus coffee maker
Common espresso / bean-to-cup cross-shops
- espresso machine with built-in grinder
- DeLonghi coffee maker with grinder
- Keurig coffee maker with grinder
- Bunn coffee maker with grinder
- Capresso coffee maker with grinder
- Melitta coffee maker with grinder
- Braun coffee maker with grinder
- Miele coffee maker with grinder
- Miele CVA 610
- Gevi espresso machine with grinder
- Calphalon espresso machine with grinder
- Beautiful Perfect Grind coffee maker
Milk drinks note: If “coffee maker with grinder and frother” or “cappuccino maker with grinder” is your real intent, treat milk workflow as the deciding feature: how fast it cleans, whether it stores milk, and whether you’ll actually do the rinse routine.
FAQ
If you’re stuck between two machines, your grinder-cleaning tolerance is usually the tie-breaker. Here are the questions that come up most when people shop for an all-in-one grinder brewer.
Are coffee makers with grinders worth it?
They’re worth it when they genuinely simplify your routine and you’ll do the basic cleaning. If you currently buy pre-ground coffee, an integrated grinder can be the biggest single taste upgrade you’ll make. If you already own a good burr grinder, the value is mostly convenience—so compare whether the brewer itself is strong enough to justify replacing your current setup.
What grind size should I start with for drip coffee?
Start around a medium-coarse setting (think “sea salt,” not powder). Then adjust based on taste: sour/weak → slightly finer or a bit more coffee; bitter/astringent → slightly coarser or a bit less coffee. Make one change at a time and keep everything else steady for two brews so you can actually tell what worked.
How do I clean the grinder without wrecking it?
Unplug first, then use dry methods: brush, vacuum with a small nozzle (if allowed), and wipe hopper surfaces with a dry cloth. Avoid introducing moisture near burrs unless your manufacturer explicitly says it’s safe. The goal isn’t “surgical clean”—it’s removing oily residue and packed fines so today’s coffee doesn’t taste like last month’s beans.