Coffee cupping is a standardized tasting method used to compare coffees fairly—without getting tangled in brew recipes, gear, or technique. So if you’re asking what is coffee cupping, it’s basically the coffee world’s cleanest “side-by-side taste test.”
What if the reason your coffee “all tastes the same” isn’t your palate—it’s your process? Cupping removes the brewing drama (filters, recipes, pour technique) and replaces it with a controlled routine that makes differences obvious. In one session, you can learn how to spot sweetness, acidity, body, and even defects—without needing fancy equipment or a 100-point scoring sheet. You just need consistency and a good note template.
Quick safety note: Cupping involves caffeine and lots of slurping (it’s part of the method). If you’re caffeine-sensitive, pregnant, or managing a condition where caffeine matters, keep portions small—or taste and spit like many pros do.
Coffee cupping, explained in plain English
Coffee cupping is a simple, repeatable way to taste multiple coffees under the same conditions. In other words, cupping means you remove variables so you can evaluate the coffee itself. If you’ve ever searched “what does cupping mean” or “cupping meaning,” this is the practical answer most coffee people are talking about.
Here’s a clean cupping definition you can remember: define cupping as “a standardized coffee taste test done side-by-side.” You’ll also hear it called the coffee cup test in some circles. And when someone says they’re cupping coffee (or asks what is cupping coffee), they mean this exact method—grind, pour, break, skim, then taste.
In the industry, cupping helps roasters buy green coffee, check roast consistency, and catch defects early. Trained coffee cuppers (often just called cuppers) do this work every day—basically a professional coffee taster role. At home, it’s the easiest way to compare beans side-by-side and learn your preferences—especially when two bags look “similar” on the label.
And if you’re wondering what does cupped mean on a note or label: a coffee that’s been cupped (sometimes casually called cupped coffee) simply means it was evaluated using this tasting setup. You can define cupped as “tasted and assessed by cupping.”
Cupping vs. brewing
Cupping: controlled and comparable. You’re judging the coffee itself.
Brewing: delicious and practical. You’re judging the coffee + your recipe + your gear.
Cupping vs. casual tasting
Cupping: you take notes at the same moments each time.
Casual tasting: “this is good!” (valid) but hard to compare later.
What you’re actually evaluating (and why it matters)
The goal isn’t fancy language—it’s a clear, consistent description of what you notice. Think of cupping like a quick “coffee testing” interview. You’re asking the coffee questions: How sweet is it? Is the acidity crisp or dull? Does it feel thin or creamy? What lingers after you swallow?
The core attributes (with real-life examples)
- Fragrance: smell of the dry grounds (think cocoa powder, toasted nuts).
- Aroma: smell after you add water (think floral, caramel, berry jam).
- Sweetness: brown sugar, honey, ripe fruit—not “sweetened.”
- Acidity: lemon zest (bright) vs. apple (round) vs. flat (muted).
- Body: watery, tea-like, silky, or syrupy.
- Balance: do the parts fit together, or does one dominate?
- Aftertaste: clean and sweet, or drying/rough.
- Clarity: distinct flavors vs. muddled “coffee-ish.”
If you want a shared vocabulary (without sounding performative), use the SCA coffee flavor wheel. Many people also call it a cupping wheel or coffee cupping wheel—think of it as a “menu of possibilities,” not a checklist.
Defects vs. preferences
Some notes are simply preference (you might hate grapefruit-like acidity, someone else loves it). A defect is different: it’s an off-flavor that suggests processing, storage, or roast issues—like papery/cardboard, rubbery, or overly smoky. If you taste something that feels “wrong” in a way you wouldn’t choose on purpose, write it down plainly and move on.
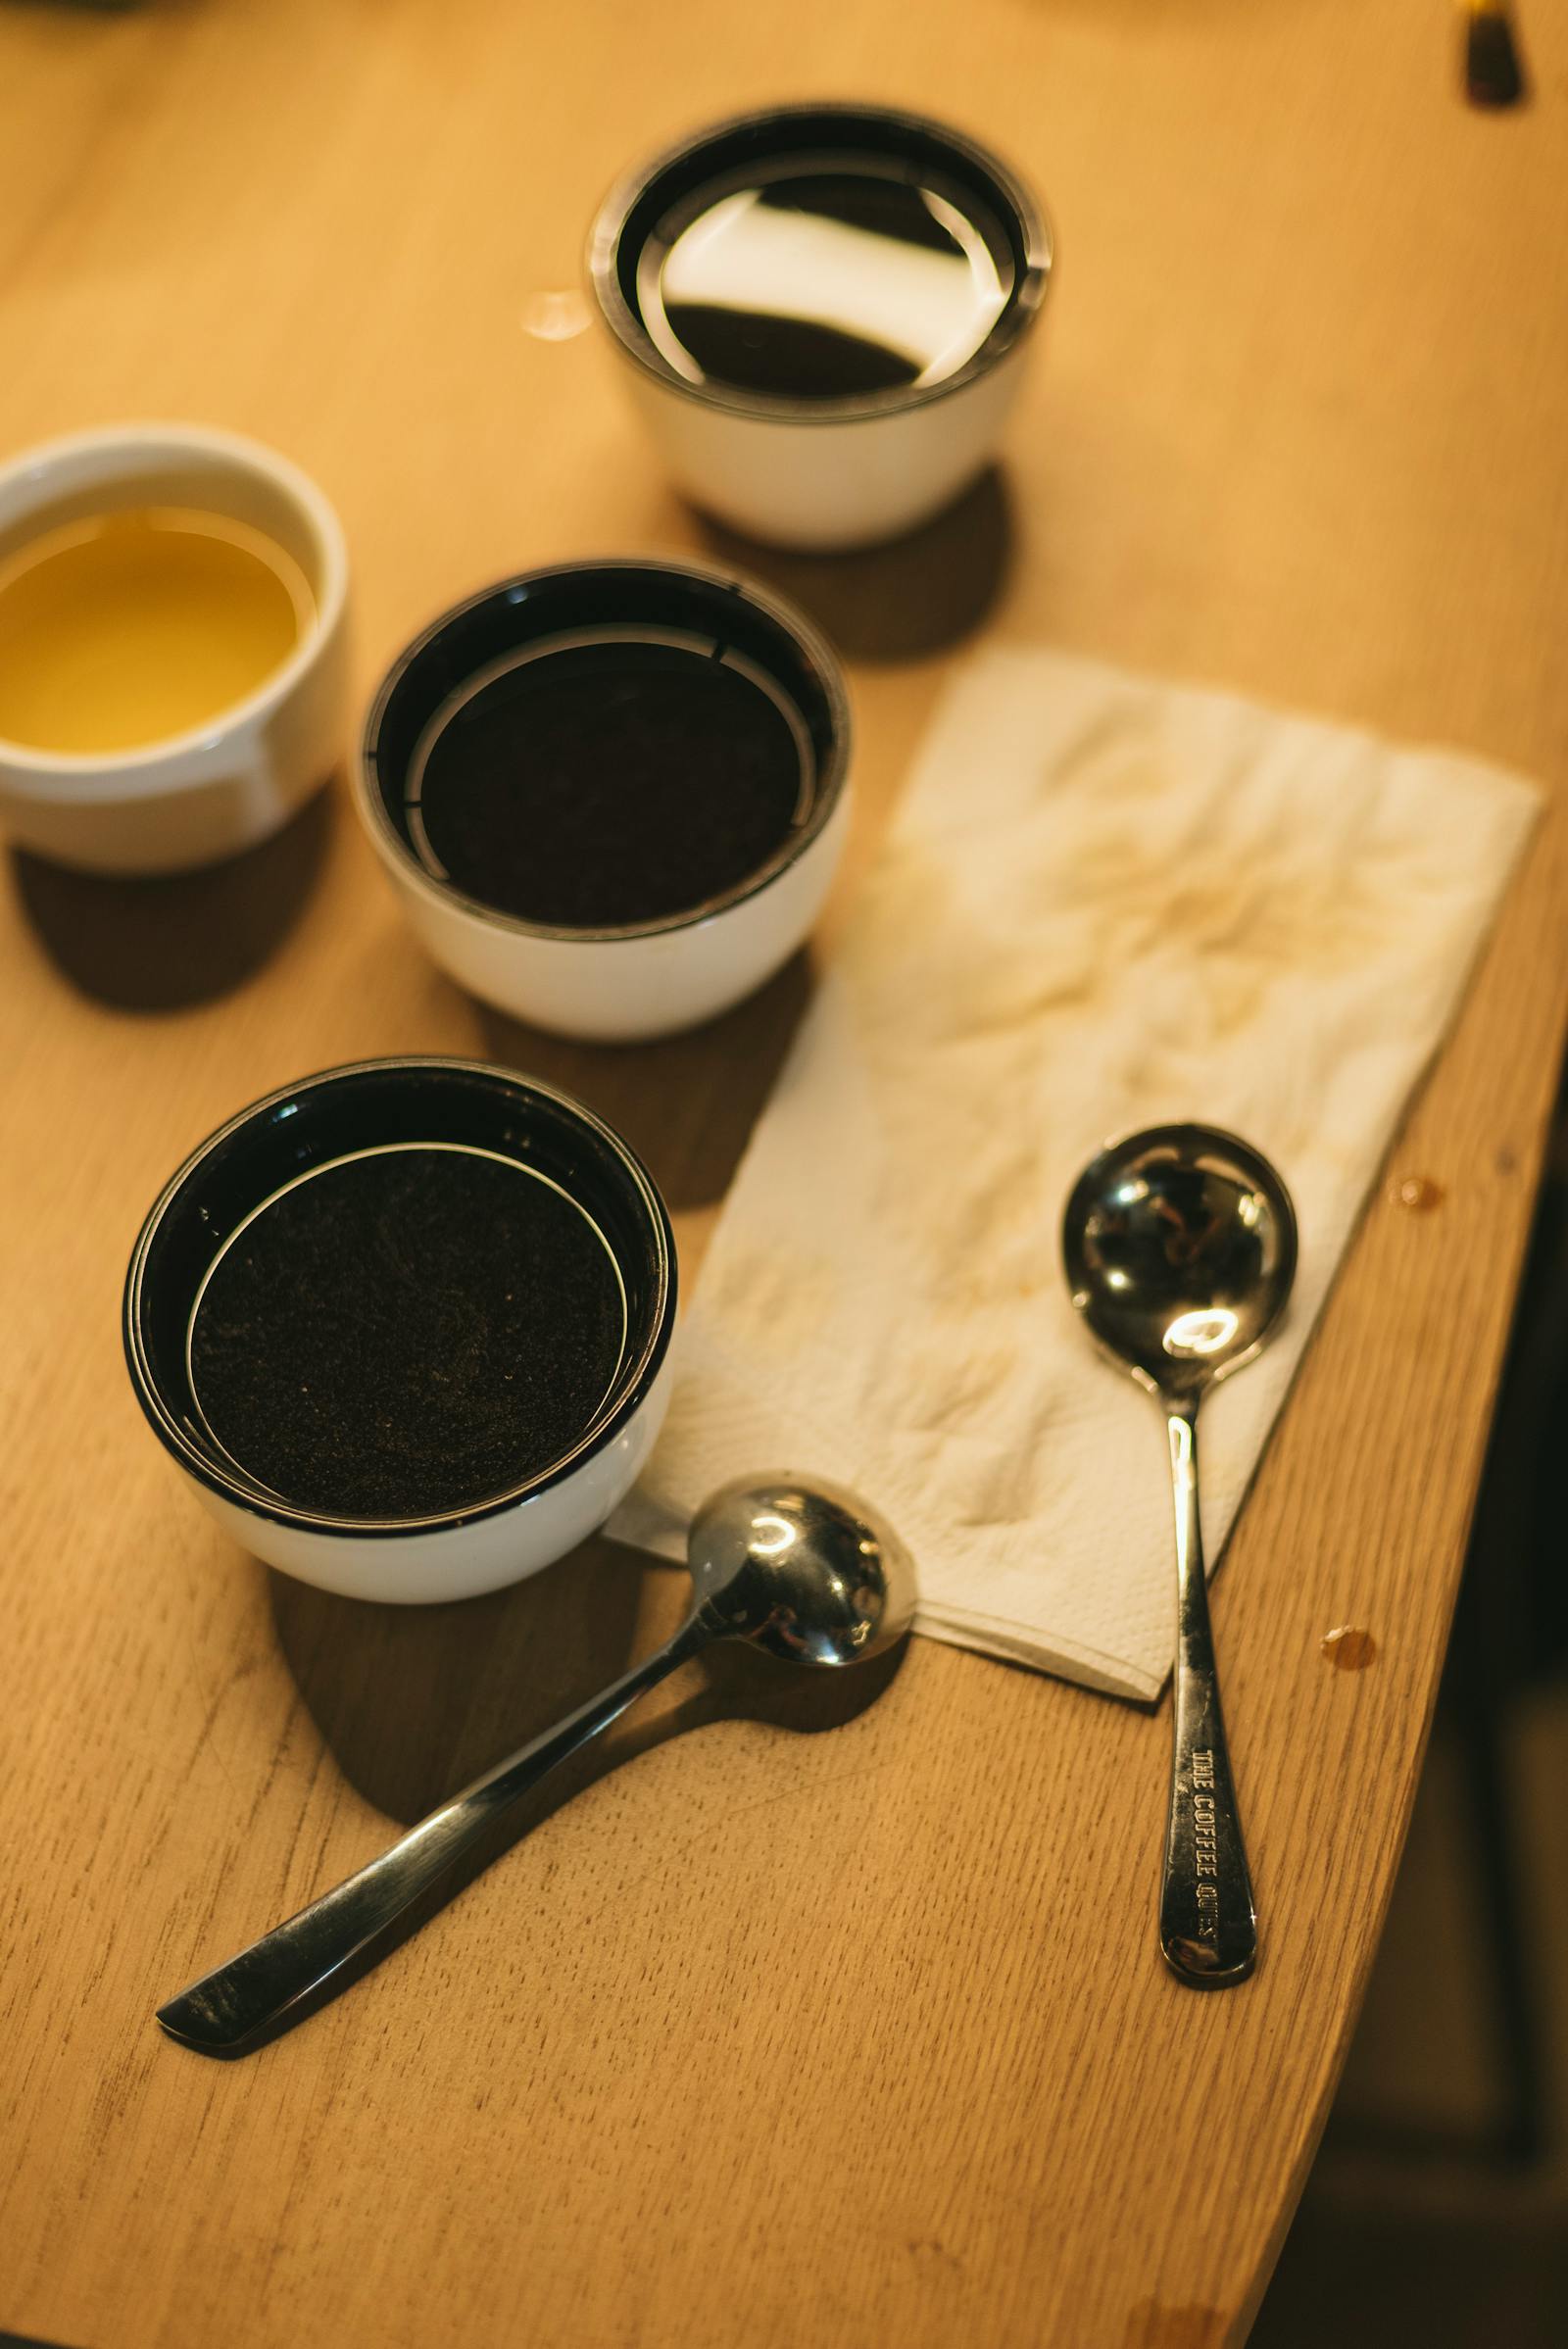
Minimal at-home cupping kit (no fancy lab gear required)
You can do a legit cupping with kitchen basics—as long as you keep variables consistent. Three cups, one grinder, one kettle, and a spoon will get you 90% of the experience.
Minimum viable setup
- Coffee tasting cups / coffee cupping cups: 2–4 identical bowls or mugs (same size matters).
- Coffee cupping bowls: shallow bowls are great, but not required.
- Grinder: burr grinder if possible; blade in a pinch.
- Kettle: gooseneck not required.
- Spoon: soup spoon works; cupping spoon is nicer.
- Scale: helpful, but you can measure by tablespoons.
- Timer: phone timer is perfect.
- Rinse cup: one mug of hot water for spoons.
Pros often do this in a dedicated cupping room with identical cupping bowls coffee setups, but you can get very close at home—just keep everything matched across cups.
Two small upgrades that matter a lot: a scale (repeatability) and good water (clarity). If your tap water tastes heavily chlorinated, your cupping notes will too.
Step-by-step cupping workflow (with timing you can follow)
Cupping works because it’s boringly consistent—same ratio, same timing, same steps. If you’re looking for how to cup coffee (or how to do a coffee cupping), start here. A common benchmark is about 55 grams per liter (roughly 8–9 g coffee to 150 g water), with water around 200°F (93°C) and a medium-coarse grind—guidelines you’ll also see in pro setups like Royal Coffee’s run a cupping table walkthrough.
Before you pour
- Label: mark cups A/B/C so you don’t “cheat” with memory.
- Grind: dose the same weight into each cup.
- Smell (dry): inhale gently—note one clear thing (e.g., cocoa, peanut butter, orange peel).
After you pour
- Pour: start your timer as water hits the grounds.
- Wait: let it steep undisturbed (this forms a “crust” of grounds on top).
- Break: around 4 minutes, stir the top gently and smell what releases.
- Skim: remove floating grounds/foam so the spoonfuls taste clean.
Taste as it cools (this is where clarity shows up)
Here’s the secret: don’t judge too early. Hot coffee can feel sharper and more confusing. As it cools, sweetness becomes clearer, and aftertaste shows its true colors—clean and juicy, or dry and harsh. This structured taste testing coffee approach is why cupping is so useful.
| Time | What you do | What to write down |
|---|---|---|
| 0:00 | Pour water + start timer | First aroma impression (one phrase) |
| 0:30–1:30 | Smell the wet aroma | Does it feel floral, nutty, fruity, roasty? |
| 4:00 | Break the crust + smell | Biggest aroma change (stronger? sweeter? funkier?) |
| 5:00 | Skim the surface | Any obvious off-notes? |
| 8:00–12:00 | Slurp and taste | Sweetness + acidity shape |
| 15:00+ | Taste again cooler | Body + aftertaste + overall “winner” |
Why the slurp matters: it sprays coffee across your palate and pulls aroma up into your nose (retronasal smell). That’s how “chocolate” or “strawberry” suddenly appears—because you’re tasting + smelling at the same time.
Spoon hygiene tip: use two spoons if you can—one to scoop, one to taste. If not, rinse in hot water between cups so cup A doesn’t “borrow” flavors from cup B.

How to take notes that make coffees easy to compare
Your notes should help “future you” remember the coffee in one glance. The easiest trick is to force clarity: write one sentence per coffee that includes (1) the main flavor family, (2) the texture/body, and (3) the finish.
A simple note format that works
- Aroma: “jasmine + honey” or “cocoa + toasted almond”
- Sweetness: low / medium / high (with a quick example)
- Acidity: lemon / apple / grape / soft / sharp
- Body: tea-like / silky / creamy / heavy
- Finish: clean / drying / lingering sweet / roasty
- One-line summary: “Peachy and bright, medium body, clean finish.”
Optional: quick scoring without the pressure
If you like numbers, keep it lightweight: score Sweetness, Acidity, Body, and Overall from 1–5. That’s enough structure to compare coffees without turning it into homework.
Click into any cell to type. Fill one row per coffee. Keep your notes short, honest, and consistent.
| Coffee | Aroma (dry/wet) | Sweetness | Acidity | Body | Finish | One-line summary |
|---|---|---|---|---|---|---|
| A | ||||||
| B | ||||||
| C |
Fast decision rule: pick the coffee you’d happily drink black twice in a row. If it’s a tie, choose the one with the cleaner finish.
Calibrating your palate (so your notes get better fast)
Your job isn’t to “find blueberry”—it’s to be consistent session after session. The quickest improvement comes from repeating the same setup and comparing coffees side-by-side, which is why guides like Perfect Daily Grind emphasize how cupping improves your palate through deliberate practice.
Consistency beats confidence. If you can describe the same coffee the same way twice, you’re improving.
Try “contrast cupping” for faster learning: pair a light, citrusy coffee with a deeper, chocolatey one. Differences get louder. Then add a third coffee that’s “in between” and see if you can place it on that spectrum.
When you get stuck on descriptors, use reference foods like lemon, grape, cocoa, toasted nuts, black tea, and brown sugar. Your brain learns faster when it has familiar anchors.
Common pitfalls (and how pros avoid them)
Most “bad cuppings” aren’t about the coffee—they’re about inconsistent conditions. Fix a few small things and your results get dramatically clearer.
- Temperature rush: tasting too hot hides sweetness.
- Uneven grind: one cup extracts faster and “wins” unfairly.
- Dirty spoons: flavors bleed cup-to-cup.
- Perfume/food: strong smells hijack your nose.
- Order bias: you favor the first cup you liked.
- Overthinking: paragraphs of notes beat one clear sentence.
- Too many coffees: start with 2–4, not 10.
- Stale beans: old coffee tastes flat and papery.
If a coffee tastes strangely ashy, rubbery, or cardboard-like, don’t ignore it—those are often the kinds of common cupping defects that cupping is meant to surface.
Advanced pro tips (optional)
Blind it: Have someone else label the cups so you’re not influenced by price or origin.
Repeat the winner: If one coffee stands out, cup it again next week against a new challenger. Your preferences will get sharper.
Use a rinse cup: One mug of hot water for rinsing spoons keeps results cleaner and more consistent.
Terminology mix-ups: If you landed here from “cupping Wikipedia” or a “cupping wiki,” note that coffee cupping is about tasting coffee—different from cupping therapy. You’ll also see Reddit threads like “purpose of cupping,” “cupping reddit,” “facial cupping reddit,” or “does cupping work reddit,” which are about the therapy practice, not coffee. (Coffee people use “cupping” as tasting shorthand.)
Bonus coffee culture note: A cupping can feel like a social “coffee tasting” hangout—similar to an old-school coffee klatch (sometimes mistyped as “coffee clutch”). Some roasters (including names people search like Silvercup Coffee) host cuppings as a community thing.
Want to try it with other people? Look for a coffee tasting event or coffee cupping at a local roaster—many cafés host regular coffee tastings and casual “coffee flights.” Search “coffee tastings near me” or “coffee cupping NYC” to find a coffee tasting experience near me, plus upcoming coffee cuppings and informal cuppings in your area.
Bottom line: Once you’ve done 2–3 cuppings with the same setup, you’ll start noticing patterns—what “sweet” feels like to you, what acidity you love, and what flavors you want to avoid. That’s the whole point: turning “good coffee” into your kind of good coffee.