How to Choose an Espresso Machine
Choosing an espresso machine is mostly about matching the machine type, grinder strategy, and heating system to your routine—then paying for the few features that truly help.
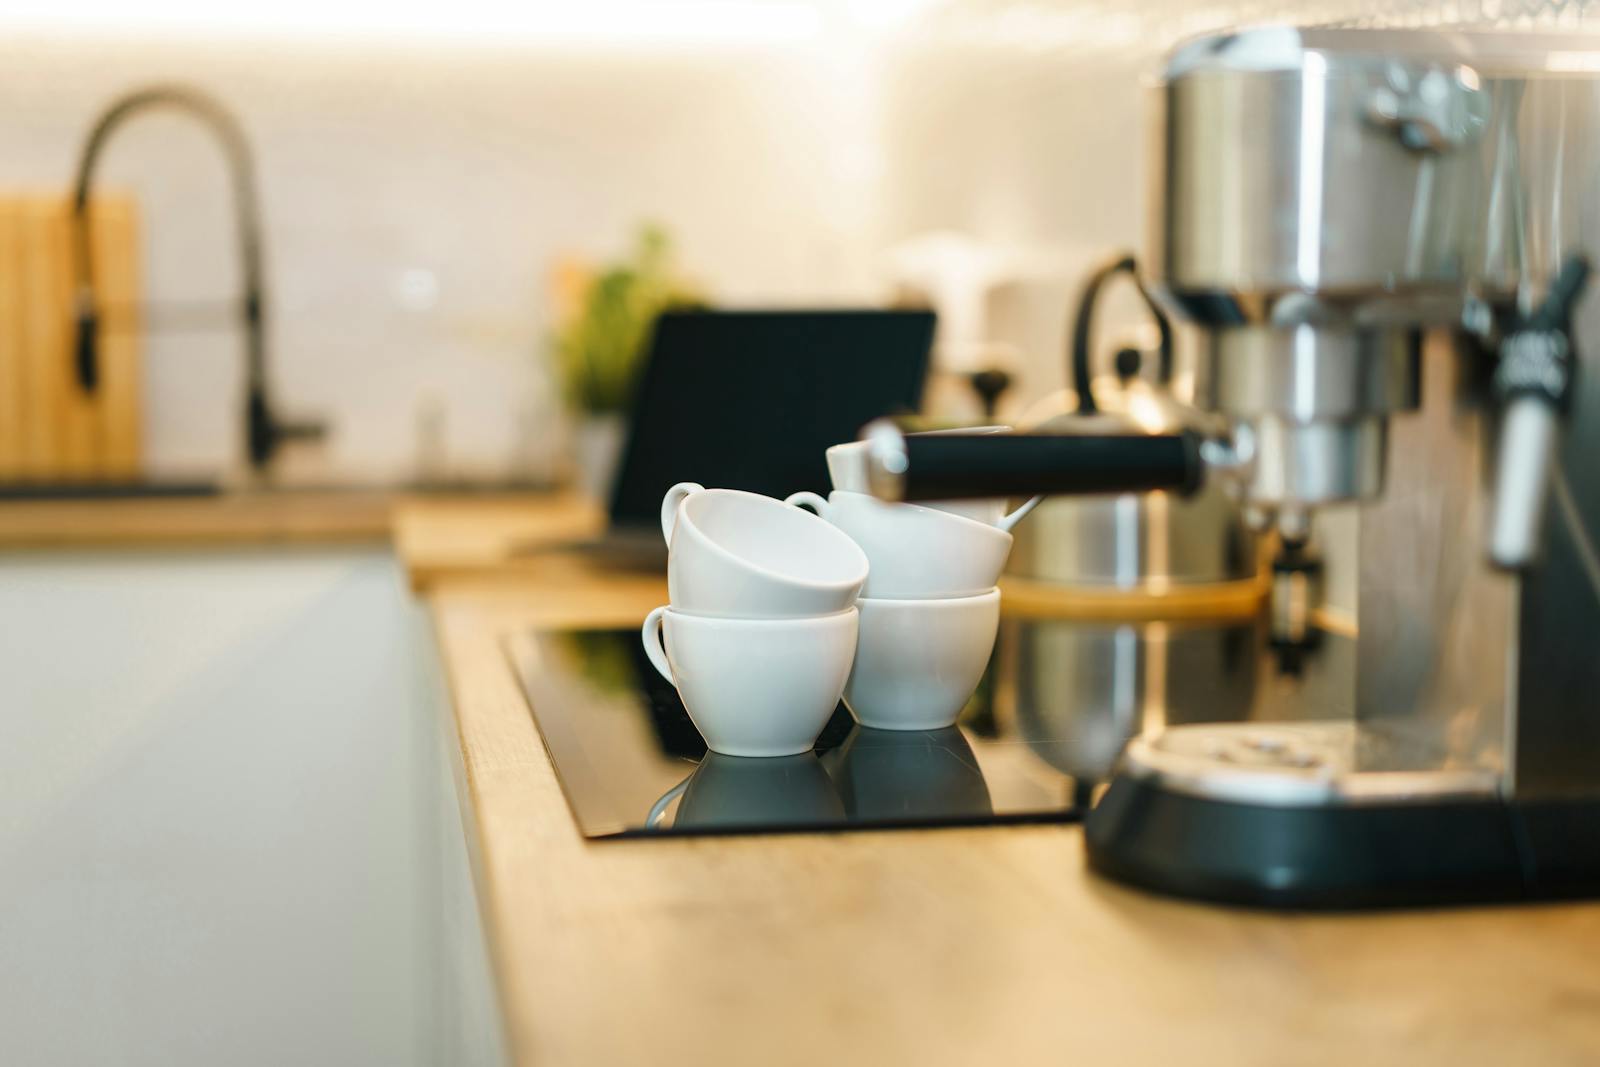
An espresso machine (often called an espresso maker) is a coffee machine that brews concentrated espresso by forcing hot water through finely-ground coffee under pressure. If you’re searching things like “what is an espresso machine” or “what espresso machine should I buy,” you’re usually deciding between hands-on café-style drinks and the simpler world of regular coffee makers.
What if the “perfect espresso machine” isn’t the one with the most features—it’s the one that makes Tuesday morning easy? A dual boiler won’t help if you hate cleaning. A super-automatic won’t satisfy you if you want to tinker. And the most expensive machine in your budget can still taste disappointing if you underbuy the grinder. Here’s a practical way to choose with fewer regrets.
TL;DR (fast pick):
- Want control and café-style taste? Choose semi-automatic + a solid grinder.
- Want speed with minimal effort? Choose a super-automatic (or capsule/pod for the smallest footprint).
- Make lattes or cappuccinos often? Prioritize strong steam and heating recovery over extra buttons.
- Shopping under $200? Expect capsule/pod convenience (you’ll see names like Nespresso—sometimes misspelled “nepresso”).
We’ll start with your habits (drinks, time, tolerance for routine), then work through the decisions that actually change results: machine type, grinder strategy, heating setup, and the few features worth paying for. If you also want regular drip coffee, you’ll want to pay attention to combo options later on (espresso + coffee in one machine).
Start with your “espresso life” (not specs)
The best espresso machine is the one you’ll still enjoy using in week three. Before you compare boilers and gauges, get honest about what you want your mornings to look like. Espresso is a small ritual—amazing when it fits, annoying when it doesn’t.
Picture your most common day. Are you making one cappuccino after breakfast, or pulling two shots while you’re half-awake and late? Those answers decide whether you should lean into hands-on control (manual/semi-auto) or hands-off convenience (super-auto/capsule).
Your non-negotiables (circle 2): speed • milk quality • easy cleanup • lowest effort • maximum flavor control • smallest footprint
If you want control…
- Flavor: You like tweaking grind size and shot time.
- Workflow: You don’t mind weighing, tamping, and wiping down.
- Learning: You’re okay with a few “sink shots” while dialing in.
If you want convenience…
- Speed: You want coffee fast, even on chaotic mornings.
- Consistency: You prefer “good every time” over “perfect sometimes.”
- Cleanup: You’d rather press a button than scrub parts.
Your drink menu (straight shots vs milk drinks)
Milk drinks (lattes, cappuccinos) change everything. They demand steam power, workflow speed, and usually more counter space for pitchers and towels. If you mostly drink straight espresso or Americanos, you can prioritize stable brewing and skip “milk-first” upgrades.
Your tolerance for routine (weigh, grind, purge, clean)
Some machines reward a little ceremony. Others punish you with extra steps. Decide what you’re willing to do daily: rinsing a portafilter, purging a steam wand, wiping a drip tray, and running quick cleaning cycles. A machine that feels “easy” will get used more—and will taste better because you’ll keep it clean.
Your time-to-coffee window (weekday reality test)
If you have 5–7 minutes, a semi-automatic can be great. If you have 90 seconds, a super-automatic or capsule setup might be your happiest choice. The goal isn’t to impress anyone—it’s to make coffee you love, on the schedule you actually keep.
Choose the right machine type: manual, semi-auto, super-auto, capsule
Machine “types” are really a promise about how much work you’ll do per drink. The labels can get confusing fast—especially when brands mix terms like “automatic” and “super-automatic.” For clean definitions, the breakdown of manual vs super-auto is a helpful baseline.
Here’s the practical version: manual and semi-auto favor customization; super-auto and capsule favor speed and consistency. This overview of types of espresso machines matches what most shoppers run into when comparing categories. And yes—when you see “espresso maker types” or “espresso machines types,” people are typically talking about these same core categories.
One more thing: in everyday shopping, “espresso maker” and “espresso machine” usually mean the same thing. If you’re searching “espresso maker vs espresso machine,” treat it as identical wording and focus on the workflow differences below.
| Type | Best for | Speed | Milk drinks | Typical regret |
|---|---|---|---|---|
| Manual lever | Tinkerers who want maximum control | Slow | Depends (often separate steaming) | “I wanted espresso, not a hobby.” |
| Semi-automatic | Café-style workflow at home | Medium | Great if steam is strong | “I didn’t realize dialing-in takes practice.” |
| Super-automatic | One-touch drinks and consistency | Fast | Easy (often auto-froth) | “I miss the flavor control.” |
| Capsule/pod | Lowest effort and smallest footprint | Fastest | Usually separate frother | “It’s convenient, but not café-level.” |
If you’re trying to compare espresso machines quickly, a good shortcut is asking: How much control do I want? and How much cleanup will I tolerate? That’s the heart of almost every espresso machine comparison—even when it’s dressed up with fancy specs.
What makes a good espresso machine? Look for stable heating, repeatable shots, and a workflow you won’t dread. When you read espresso maker ratings or “top rated espresso machines” roundups, pay extra attention to consistency, steaming performance, and how annoying (or easy) daily cleaning sounds in real life.
Manual lever: maximum control, maximum involvement
Manual levers can be wildly satisfying—like driving stick shift. You control pressure with your hands, which can produce gorgeous shots. But it also means you’re responsible for consistency. If you love experimenting and don’t mind the learning curve, a lever can be a dream.
Real-life fit: A lever makes sense if you treat espresso like a craft project and only make a drink or two at a time. If you want fast lattes for multiple people, it’s usually the wrong tool for the job.
Semi-automatic: café-style workflow at home
This is the “classic home barista” lane: grind, dose, tamp, brew, and (maybe) steam milk. The upside is control over taste. The downside is you’ll need a decent grinder and a little patience. If you enjoy the process even a bit, semi-auto offers the best value for flavor per dollar.
Real-life fit: If you like the idea of improving over time—better beans, better technique—semi-auto is the category that actually rewards you.
Super-automatic & capsule: speed + repeatability
Super-automatics grind, dose, and brew with a button press. Capsules do the same with even less cleanup. These shine for households where people want different drinks, or when you know you won’t keep up with a hands-on routine. The tradeoff is less control over extraction—and often a softer espresso profile than a dialed-in semi-auto.
Real-life fit: If your best coffee routine is the one you’ll never skip, convenience isn’t “cheating.” It’s good decision-making.
If you’re curious about “making coffee in a superautomatic espresso machine,” it’s basically the easiest path: press a drink button, it grinds and brews automatically, and many models handle milk drinks with minimal cleanup—perfect for busy mornings.
Don’t underbuy the grinder (and don’t overbuy the machine)
If the grinder can’t make consistent, fine adjustments, the machine can’t save the shot. Espresso is sensitive. Tiny grind changes can move a shot from sour to sweet to bitter. That’s why people feel disappointed after buying a “nice machine” while keeping a weak grinder.
Grinder-first is the boring answer—and it’s usually the correct one.
Built-in grinder vs separate grinder
Built-in grinders are convenient and space-saving, but they can limit adjustability and serviceability. A separate grinder gives you more control and a clearer upgrade path. If you like the idea of improving your espresso over time, separate usually wins. If you want a tidy counter and “good enough” espresso every day, built-in can be perfectly smart.
Burr basics and adjustability that matters
For espresso, what matters isn’t hype—it’s repeatable adjustments that can go fine enough without jumping around. You want a grinder that lets you make small changes, then reliably return to a setting. If you’re shopping in person, a good sign is a dial that feels precise rather than “clicky and vague.”
A simple “starter setup” budget split
As a rule of thumb, try splitting your spend so the grinder isn’t an afterthought. One practical approach: 40–50% grinder, 50–60% machine for semi-auto setups. That ratio keeps you from buying a powerful machine that can’t reach its potential because the grind is inconsistent.
Wondering about the “best espresso machine for ground coffee”? If you mean pre-ground coffee, it’s doable, but it’s less predictable. Pressurized baskets can make pre-ground more forgiving, while non-pressurized setups usually taste best when you grind fresh and fine enough for espresso.
Example split (mid-budget)
- $1,200 total: ~$500 grinder + ~$700 machine.
- Goal: consistent shots you can dial in fast.
Example split (entry semi-auto)
- $700 total: ~$300 grinder + ~$400 machine.
- Goal: learn technique without overspending.
Pick the heating system that matches your milk habit
Heating choice isn’t trivia—it’s the difference between smooth lattes and “why am I waiting again?” Espresso machines have to do two different jobs: brew around ~200°F and steam much hotter. The more often you switch between those jobs, the more heating design matters.
Most entry machines do fine for 1–2 drinks, then slow down when you try to make three lattes back-to-back. That doesn’t mean they’re “bad.” It means they’re tuned for a normal home rhythm, not a café line.
Rule of thumb (milk drinks/day): 0–1 → entry heating is fine • 2–3 → prioritize stronger steam/recovery • 4+ often → consider higher-end heating to avoid waiting
Thermoblock vs boiler: what it changes day-to-day
Thermoblock/thermocoil machines heat water on demand. They can warm up quickly and take up less space, but steam strength and consistency vary by model. Boiler machines store hot water in a tank, which can mean more stable brewing and stronger steam—at the cost of longer warm-up and more energy use.
Single boiler vs heat exchanger vs dual boiler
Single boilers typically brew and steam at different temperatures, so you switch modes. Heat exchangers can brew and steam more seamlessly, but they may require a bit of technique to keep temps consistent. Dual boilers are the “no compromises” path for milk drinks: brew and steam simultaneously with less waiting. Clive Coffee’s overview of espresso machine features covers the common heating choices shoppers compare.
Also: higher-end heating is one reason an espresso machine can feel “expensive.” You’re often paying for faster recovery, stronger steam, more stability, and long-term serviceability—not just shiny buttons.
How many drinks in a row is “too many” for entry setups
For most entry machines, two milk drinks in a row is fine. Three or four can feel slow, especially if you’re reheating and re-steaming. If you host brunch a lot, that’s when it’s worth paying for stronger steam, faster recovery, and workflows that don’t make you babysit the machine.
Features that actually change taste (and which ones are just “nice”)
Buy features that reduce guesswork: stable temperature, repeatable timing, and a clean workflow. A shiny spec list can distract you from the basics: consistent grind, decent water, and a machine that holds temperature. Once those are handled, features can make dialing-in easier and more repeatable.
Must-have (most buyers)
- Shot timer: Helps you learn what “good” looks like.
- Stable temps: Especially helpful for lighter roasts.
- Good steam wand: If you drink milk drinks often.
- Easy cleaning: Keeps flavor from drifting over time.
Nice-to-have (when you’re ready)
- PID: More consistent temperature control.
- Pre-infusion: Can reduce channeling on tricky beans.
- Flow control: Fun for experimentation (not required).
- Volumetric: Handy for repeatable busy mornings.
Common beginner mistakes (and easy fixes): If shots taste sour, grind a bit finer and extend time. If shots taste bitter, grind slightly coarser or reduce time. If results swing wildly, focus on consistent dosing and tamping before chasing new accessories.
PID temperature control and shot timers
A PID helps keep brew temperature stable, which can make your shots taste less “random.” If you enjoy lighter roasts or want repeatability, it’s one of the few features that genuinely reduces frustration. Pair it with a shot timer and you’ll improve faster because you can connect inputs (dose, grind, time) to flavor.
Pre-infusion, flow control, and dialing-in
Pre-infusion wets the puck before full pressure, which can help reduce channeling. Flow control is a bigger leap: it lets you shape the shot as it runs. It’s great for enthusiasts, but not necessary for great espresso. If you’re new, you’ll get more value from a grinder upgrade and consistent puck prep.
Pressure gauges and volumetric buttons
Pressure gauges are useful training wheels. They can hint at grind issues, but they won’t fix them. Volumetric buttons are more practical: if you make the same drink every morning, being able to repeat a consistent shot volume can feel like a quality-of-life upgrade.
Milk steaming: decide whether you want to learn the wand
Milk drinks are the fastest way to love (or hate) your espresso machine. A strong steam wand turns latte-making into a smooth rhythm. A weak or awkward wand turns it into a loud waiting game. Before you buy, decide whether you want to learn microfoam or simply press a one-touch milk button.

Steam wand path (best texture)
- Texture: Best for silky microfoam and latte art.
- Skill: You’ll improve quickly with repetition.
- Payoff: Big jump in café-style drinks at home.
Auto-froth path (best convenience)
- Speed: Great for busy households.
- Consistency: Similar results every day.
- Tradeoff: Less control over foam texture.
Steam wand power, microfoam, and learning curve
Wand steaming is easier than it looks once you learn the feel: a little “paper tearing” sound to add air, then a gentle whirlpool to smooth the foam. The big limiter is power and recovery time. A strong wand can texture milk in under a minute; a weak one can feel endless and produce big bubbles.
Auto-frothing: consistency vs control
Auto-frothing is a gift if you want fast cappuccinos without learning technique. The main tradeoff is flexibility. If you’re picky about latte art texture, you’ll likely prefer a traditional wand. If you want “press button, get latte,” a good cappuccino machine with one-touch milk is hard to beat.
Fit, water, noise, and cleanup: the unsexy deal-breakers
A machine can be “perfect” on paper and still be miserable on your counter. This is where people get surprised: the tank is hard to refill, the drip tray fills constantly, the wand doesn’t fit under cabinets, or the whole setup is so loud it wakes up the house.
Think of this as the ownership test. If you can live with the daily stuff—refills, wipe-downs, quick cleans—you’ll love the machine. If you can’t, you’ll start “forgetting” to use it. These little coffee machine details matter more than most shoppers expect.
Quick checks before you buy
- Footprint: Measure the base and the working space around it.
- Clearance: Make sure you can remove the water tank without moving the machine.
- Portafilter swing: Check handle clearance near drawers/backsplashes.
- Drip tray: Easy to remove and clean without spilling.
- Steam wand: Enough range of motion to position a pitcher comfortably.
Water note: Hard water is a silent machine killer. If your tap water leaves spots on dishes, plan on a simple filtration strategy and a realistic descaling schedule. It’s cheaper than repairs—and your espresso will taste cleaner, too.
Quick daily routine (keeps flavor clean): purge the group for a second, wipe the basket rim, purge and wipe the steam wand after use, then empty the drip tray before it smells like yesterday’s latte.
Counter footprint + cabinet clearance (top-fill tanks matter)
Some machines are short but deep. Others are tall and need overhead clearance to refill. Top-fill designs are convenient, but a removable rear tank can be annoying if the machine sits under cabinets. Measure espresso machine size like you’re moving in a small appliance: width, depth, and height with room to work.
Water filtration + descaling planning
If you want to keep things simple, a small in-tank filter or filtered pitcher can go a long way. If you want to be more serious, you can use a dedicated filter system. The “best” choice is the one you’ll actually stick with—because consistent water care is what keeps performance steady over years.
Noise and vibration (especially in apartments)
Grinders are often louder than machines. And some pumps vibrate more than others. If noise matters, shop with your household in mind: early mornings, shared walls, sleeping kids. A quieter setup makes daily use feel smoother—and less like you’re starting a tiny construction project at 6:45 a.m.
Your purchase plan: a confident shortlist in 15 minutes
Don’t hunt for “best overall”—build a shortlist that fits your routine and budget. The fastest path is narrowing by type, then choosing the heating and features that match your drinks. Many product roundups share similar “buyer criteria” checklists; the Spruce Eats guide is a good example of what to look for when you’re comparing models side by side.
If you’re stuck asking “which espresso machine should I buy?” or “what espresso machine to buy?”, start by choosing the right category first. Then you can compare a short list of models without spiraling into spec overload.
The 3-question filter that narrows 80% of options
- What espresso drinks do you make most? Straight espresso → prioritize stability. Milk drinks → prioritize steam.
- How hands-on do you want to be? Tinkering → semi-auto. One-touch → super-auto/capsule.
- How many drinks back-to-back? One or two → entry setups work. Frequent rounds → stronger heating.
What to buy now vs later (accessories & upgrades)
Buy now: a capable grinder (if semi-auto), a simple scale, a milk pitcher (if needed), and a tamper that feels comfortable in your hand. Buy later: bottomless portafilters, fancy baskets, flow-control upgrades, and “optimization” gear. If you start with a solid core setup, upgrades become fun instead of rescue missions.
Budget and use-case reality check: If you’re shopping for the best espresso machine under $200, capsule/pod machines are usually the smoothest experience. If you’re buying a café espresso machine or a commercial espresso machine for a small business, the priorities shift to high-volume steaming, fast recovery, and service support—this guide is focused on home espresso.
If you want an “espresso and coffee maker” in one (regular coffee + espresso-style drinks), look for combo machines or coffee makers with an espresso option. Just be honest about what you’ll use most—because the “best combination coffee espresso machine” is the one that matches your daily habit, not the most complicated box on the shelf.
When shopping, you’ll also run into model names and retailer searches. For example, the Breville Barista Express is a popular all-in-one style for home, while machines like Decent appeal to deep tinkering. Entry machines are commonly stocked at places like Target or Best Buy—prioritize warranty, returns, and parts availability over saving a few dollars.
If you’re stuck between two models, it can help to skim real-world owner notes (forums or “espresso machine reddit” threads) for things spec sheets won’t tell you—noise, cleanup quirks, reliability, and how annoying the drip tray is in daily life.
Printable decision matrix (Zero-JS style worksheet): Tap into a cell and type. Score 1–5 per row (5 = best match), then total the columns.
FAQs: quick answers before you check out
If you’re torn between two categories, pick the one you’ll use more often. Most last-minute doubt comes from trying to buy for an imaginary lifestyle instead of your normal week. These quick answers help you commit with confidence.
What’s the best espresso machine type for beginners?
If you want to learn and don’t mind a little practice, a semi-automatic is the sweet spot: it teaches you the basics and can make truly great coffee. If you want the simplest daily experience, a super-automatic is often the happiest beginner choice because it removes the hardest variables.
Do I need a separate grinder?
If you’re buying a semi-automatic, a capable grinder is the biggest lever for better shots. A built-in grinder can work if it’s consistent and adjustable enough, but a separate grinder usually gives you better control and an easier upgrade path. If you’re choosing a super-automatic or capsule machine, you don’t need a separate grinder at all.
Also: you don’t need a traditional espresso machine to get espresso-style drinks (capsules and concentrates exist), but a real espresso machine is the best path to café-style control, texture, and milk drinks that taste legit.
Is a dual boiler worth it for milk drinks?
It’s worth it when you regularly make multiple milk drinks back-to-back and hate waiting between brewing and steaming. If you only make one latte at a time, you can often save money by choosing a machine with solid steaming and good temperature stability instead of jumping straight to dual boiler territory.
One last note: people sometimes type “expresso machine” when they mean espresso machine. Same intent—just the wrong spelling. Either way, buy for your routine, protect your budget for the grinder (if you’re going semi-auto), and prioritize steam performance if milk drinks are your daily driver.
